
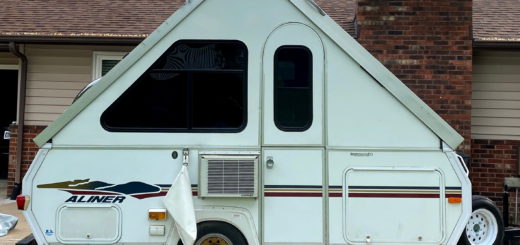
Tiny Camper Remodel: Before and After
A lot has changed since I bought my first camper. It feels like it was only yesterday that I was naively thinking to myself that I wouldn’t need to change much to have the camper just the way I wanted it.
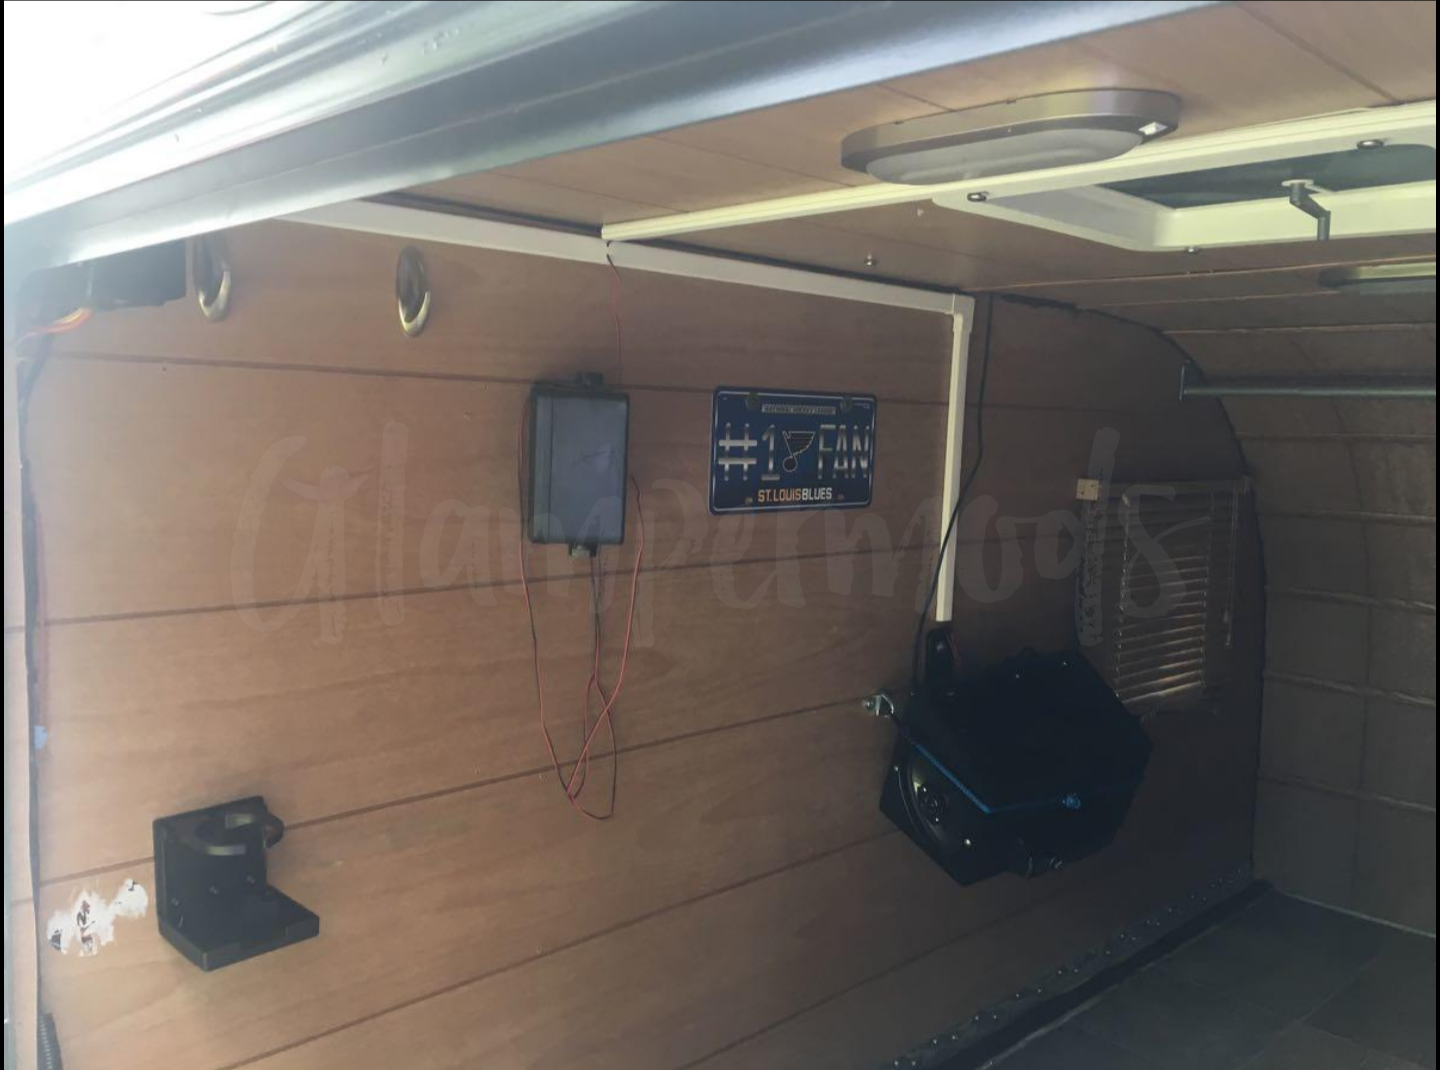
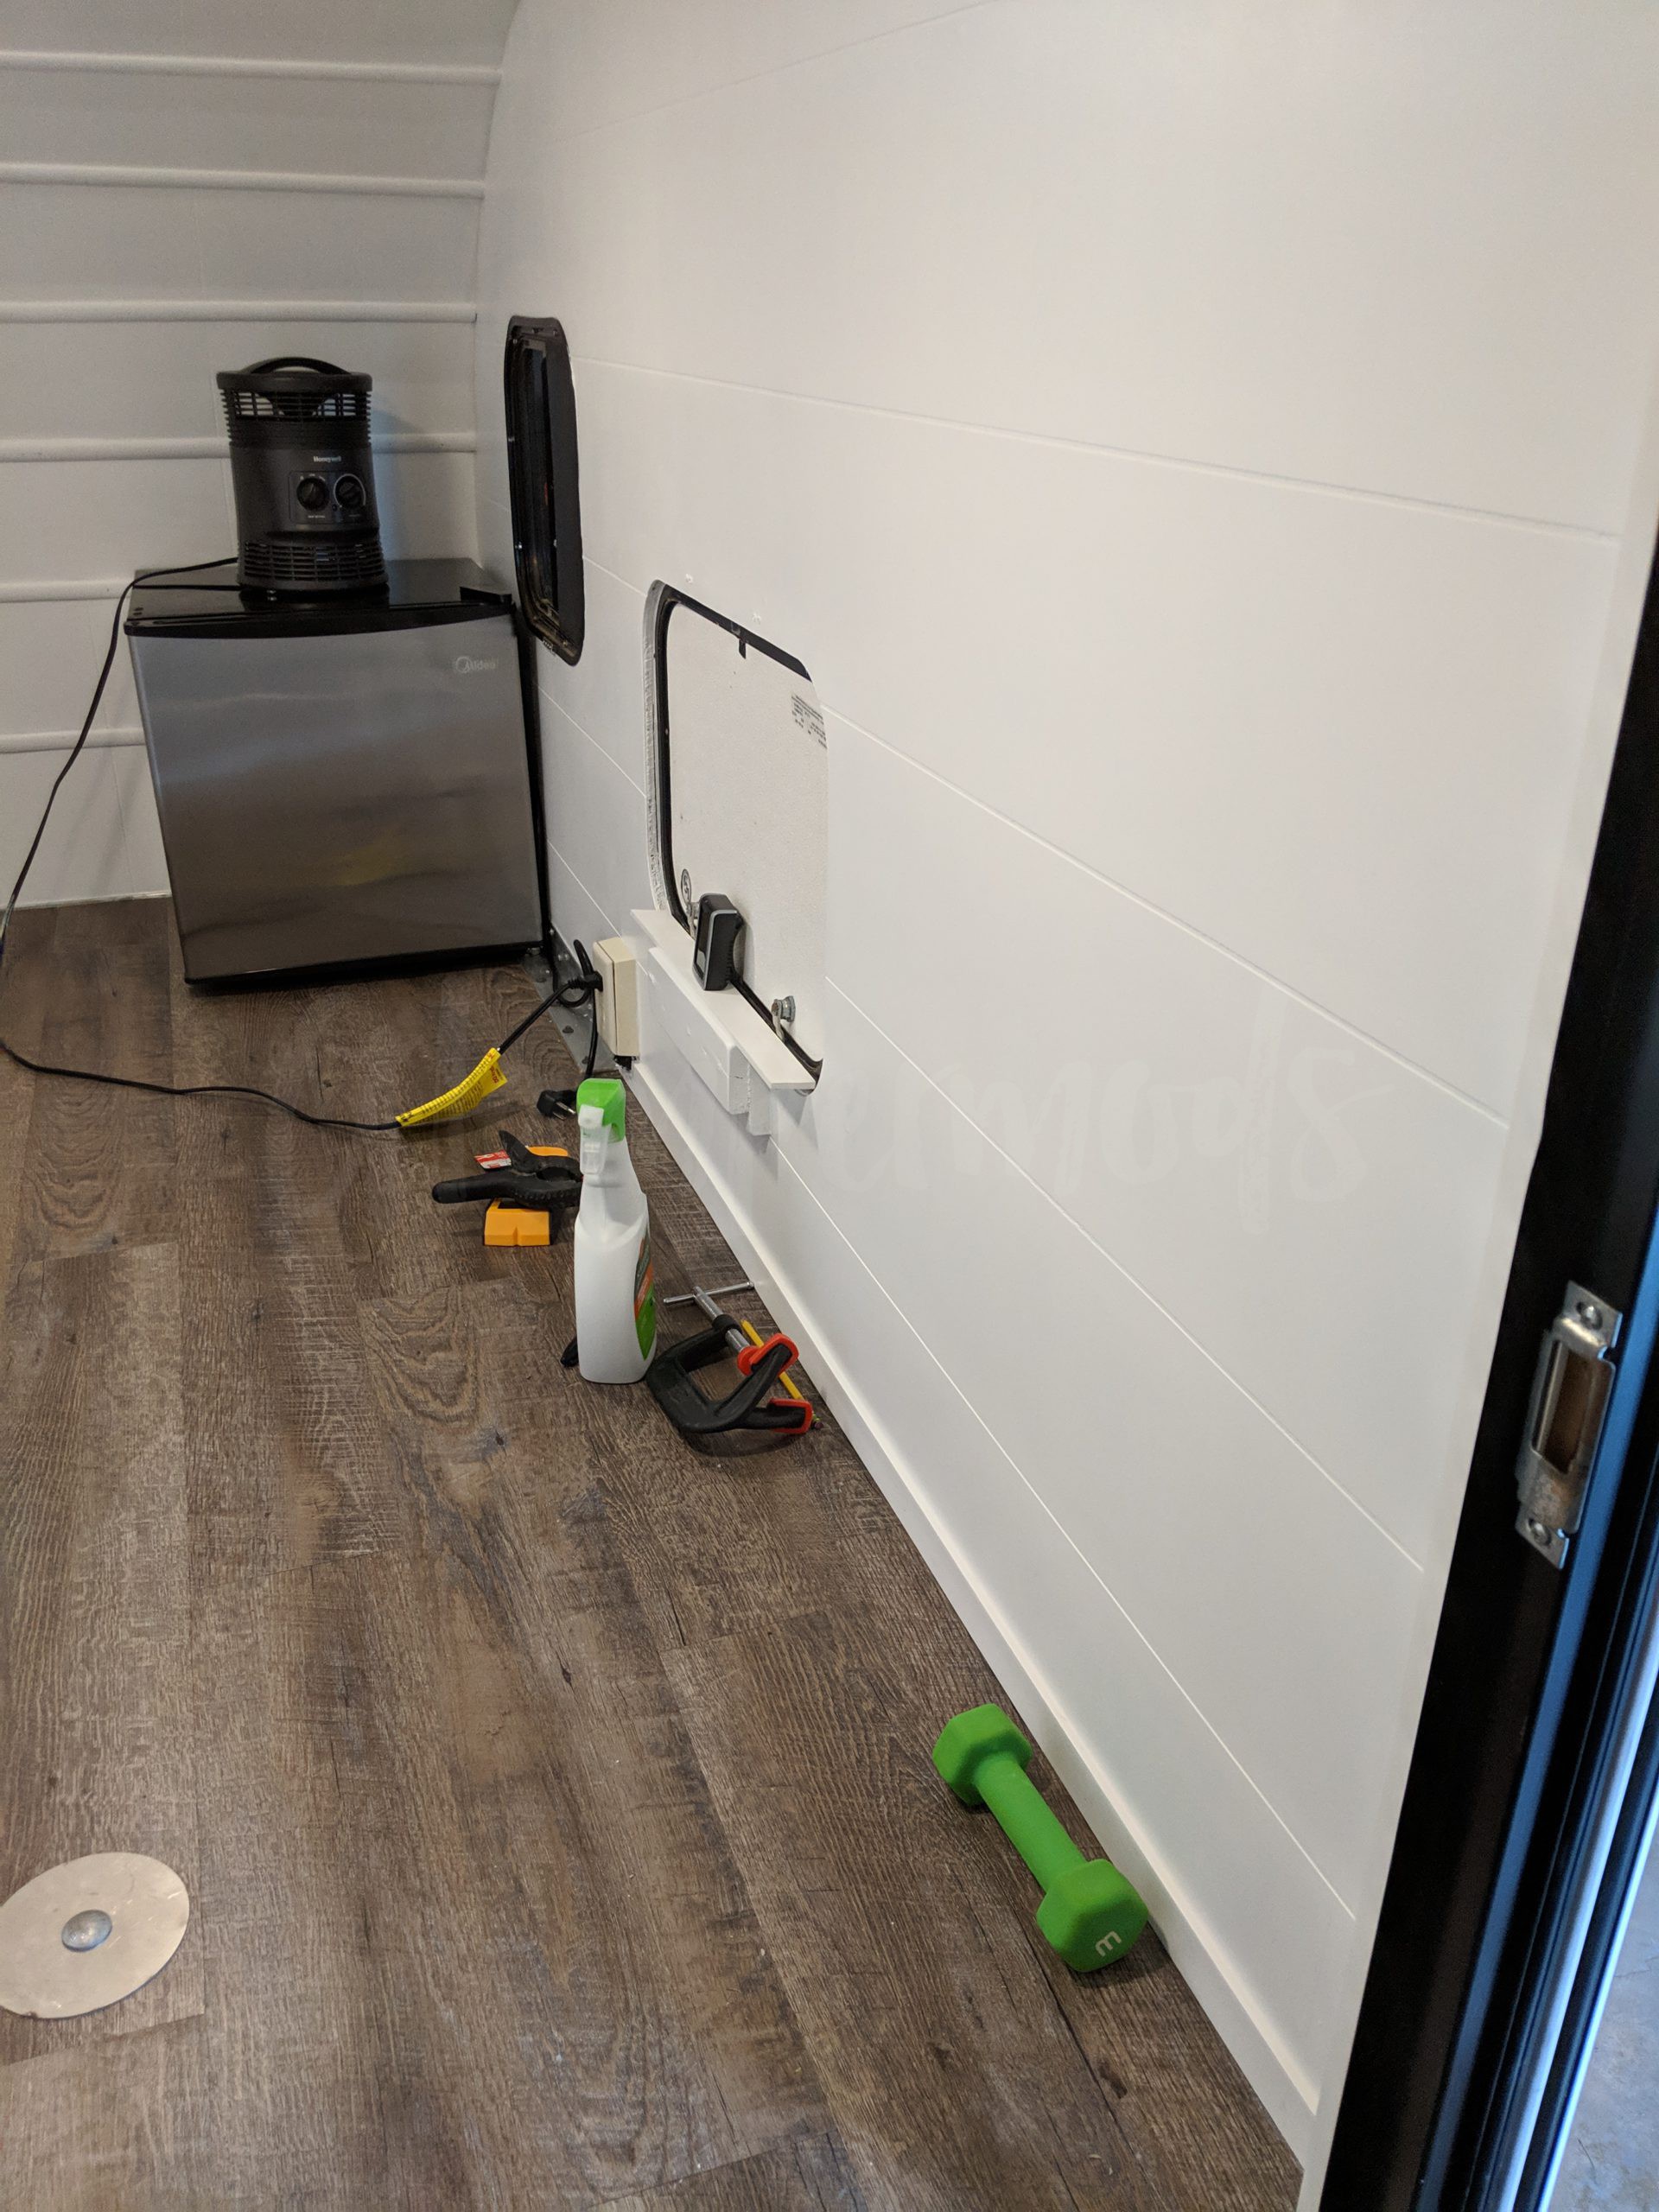
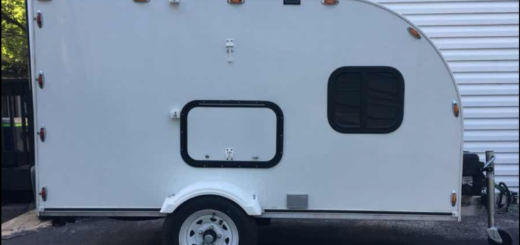
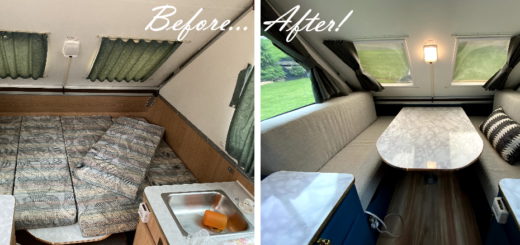
As a reminder, here is how the interior looked the day I bought her:


Before I started my remodel project, I did what I do before every project – I built my camper in Sketchup and came up with a design. I like using Sketchup for a two primary reasons. First, it lets me play around with ideas without the work and risk of trying to do it by trial and error in the real world. Second, it gives me the ability to test color combinations, something a non-designer savvy person like me desperately needs. Sketchup is free, but a word of caution – it will take a little bit of time and effort to learn how to use effectively (YouTube is your friend). I knew I wanted to do a mostly grey and white color scheme, and make the interior very modern and sleek to match the exterior. I also knew an interior fridge was a must-have, and some kind of storage and surfaces.

Paint and Floors
One of the very first things I did was remove the existing floor, a single sheet of laminate meant to look like slate tile. The floor wasn’t bad, but I wanted something a bit more modern. I chose a vinyl plank peel and stick flooring that I picked out from Home Depot. I went with vinyl plank due to its waterproof properties and ease of installation. I chose peel and stick over floating because I was worried about a floating floor shifting around too much in such a small space. In the end I would advise against a peel and stick flooring though as I struggled with keeping the planks stuck to the floor, especially in direct sunlight.
While I had the original floor peeled up, I went ahead and primed the wood veneer paneling with Killz 3 Premium Primer for its eventual facelift to a new bright white color. I used . I also caulked all of the interior seams and roof spines with a super flexible caulk just as added protection from bugs and moisture.

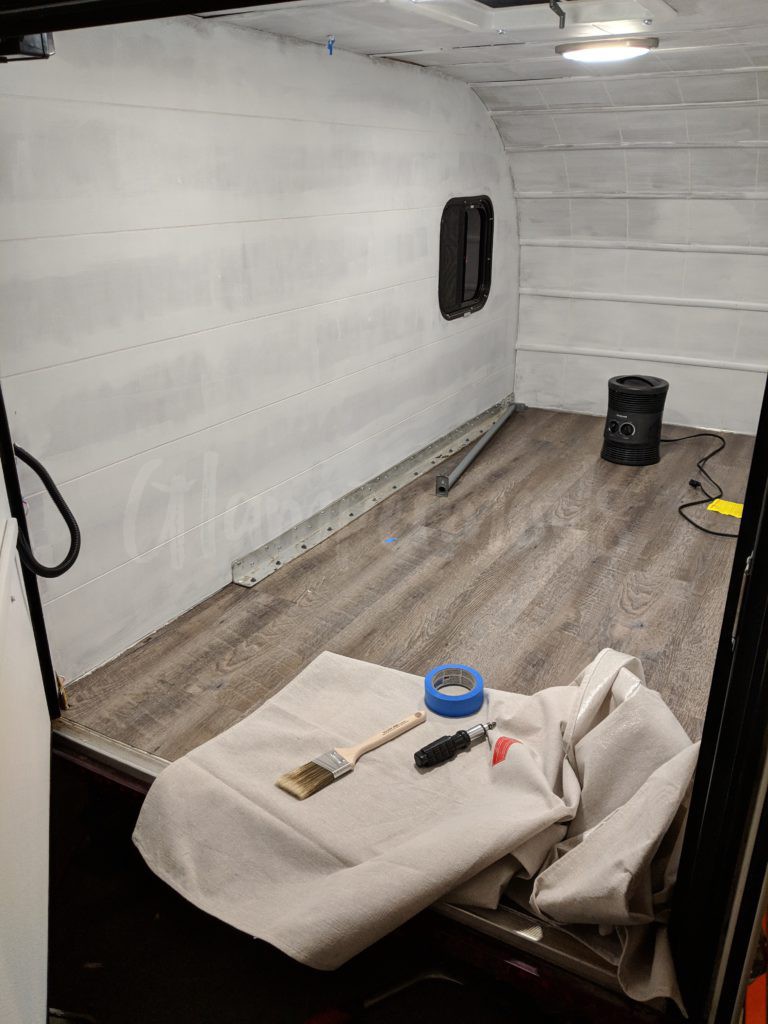
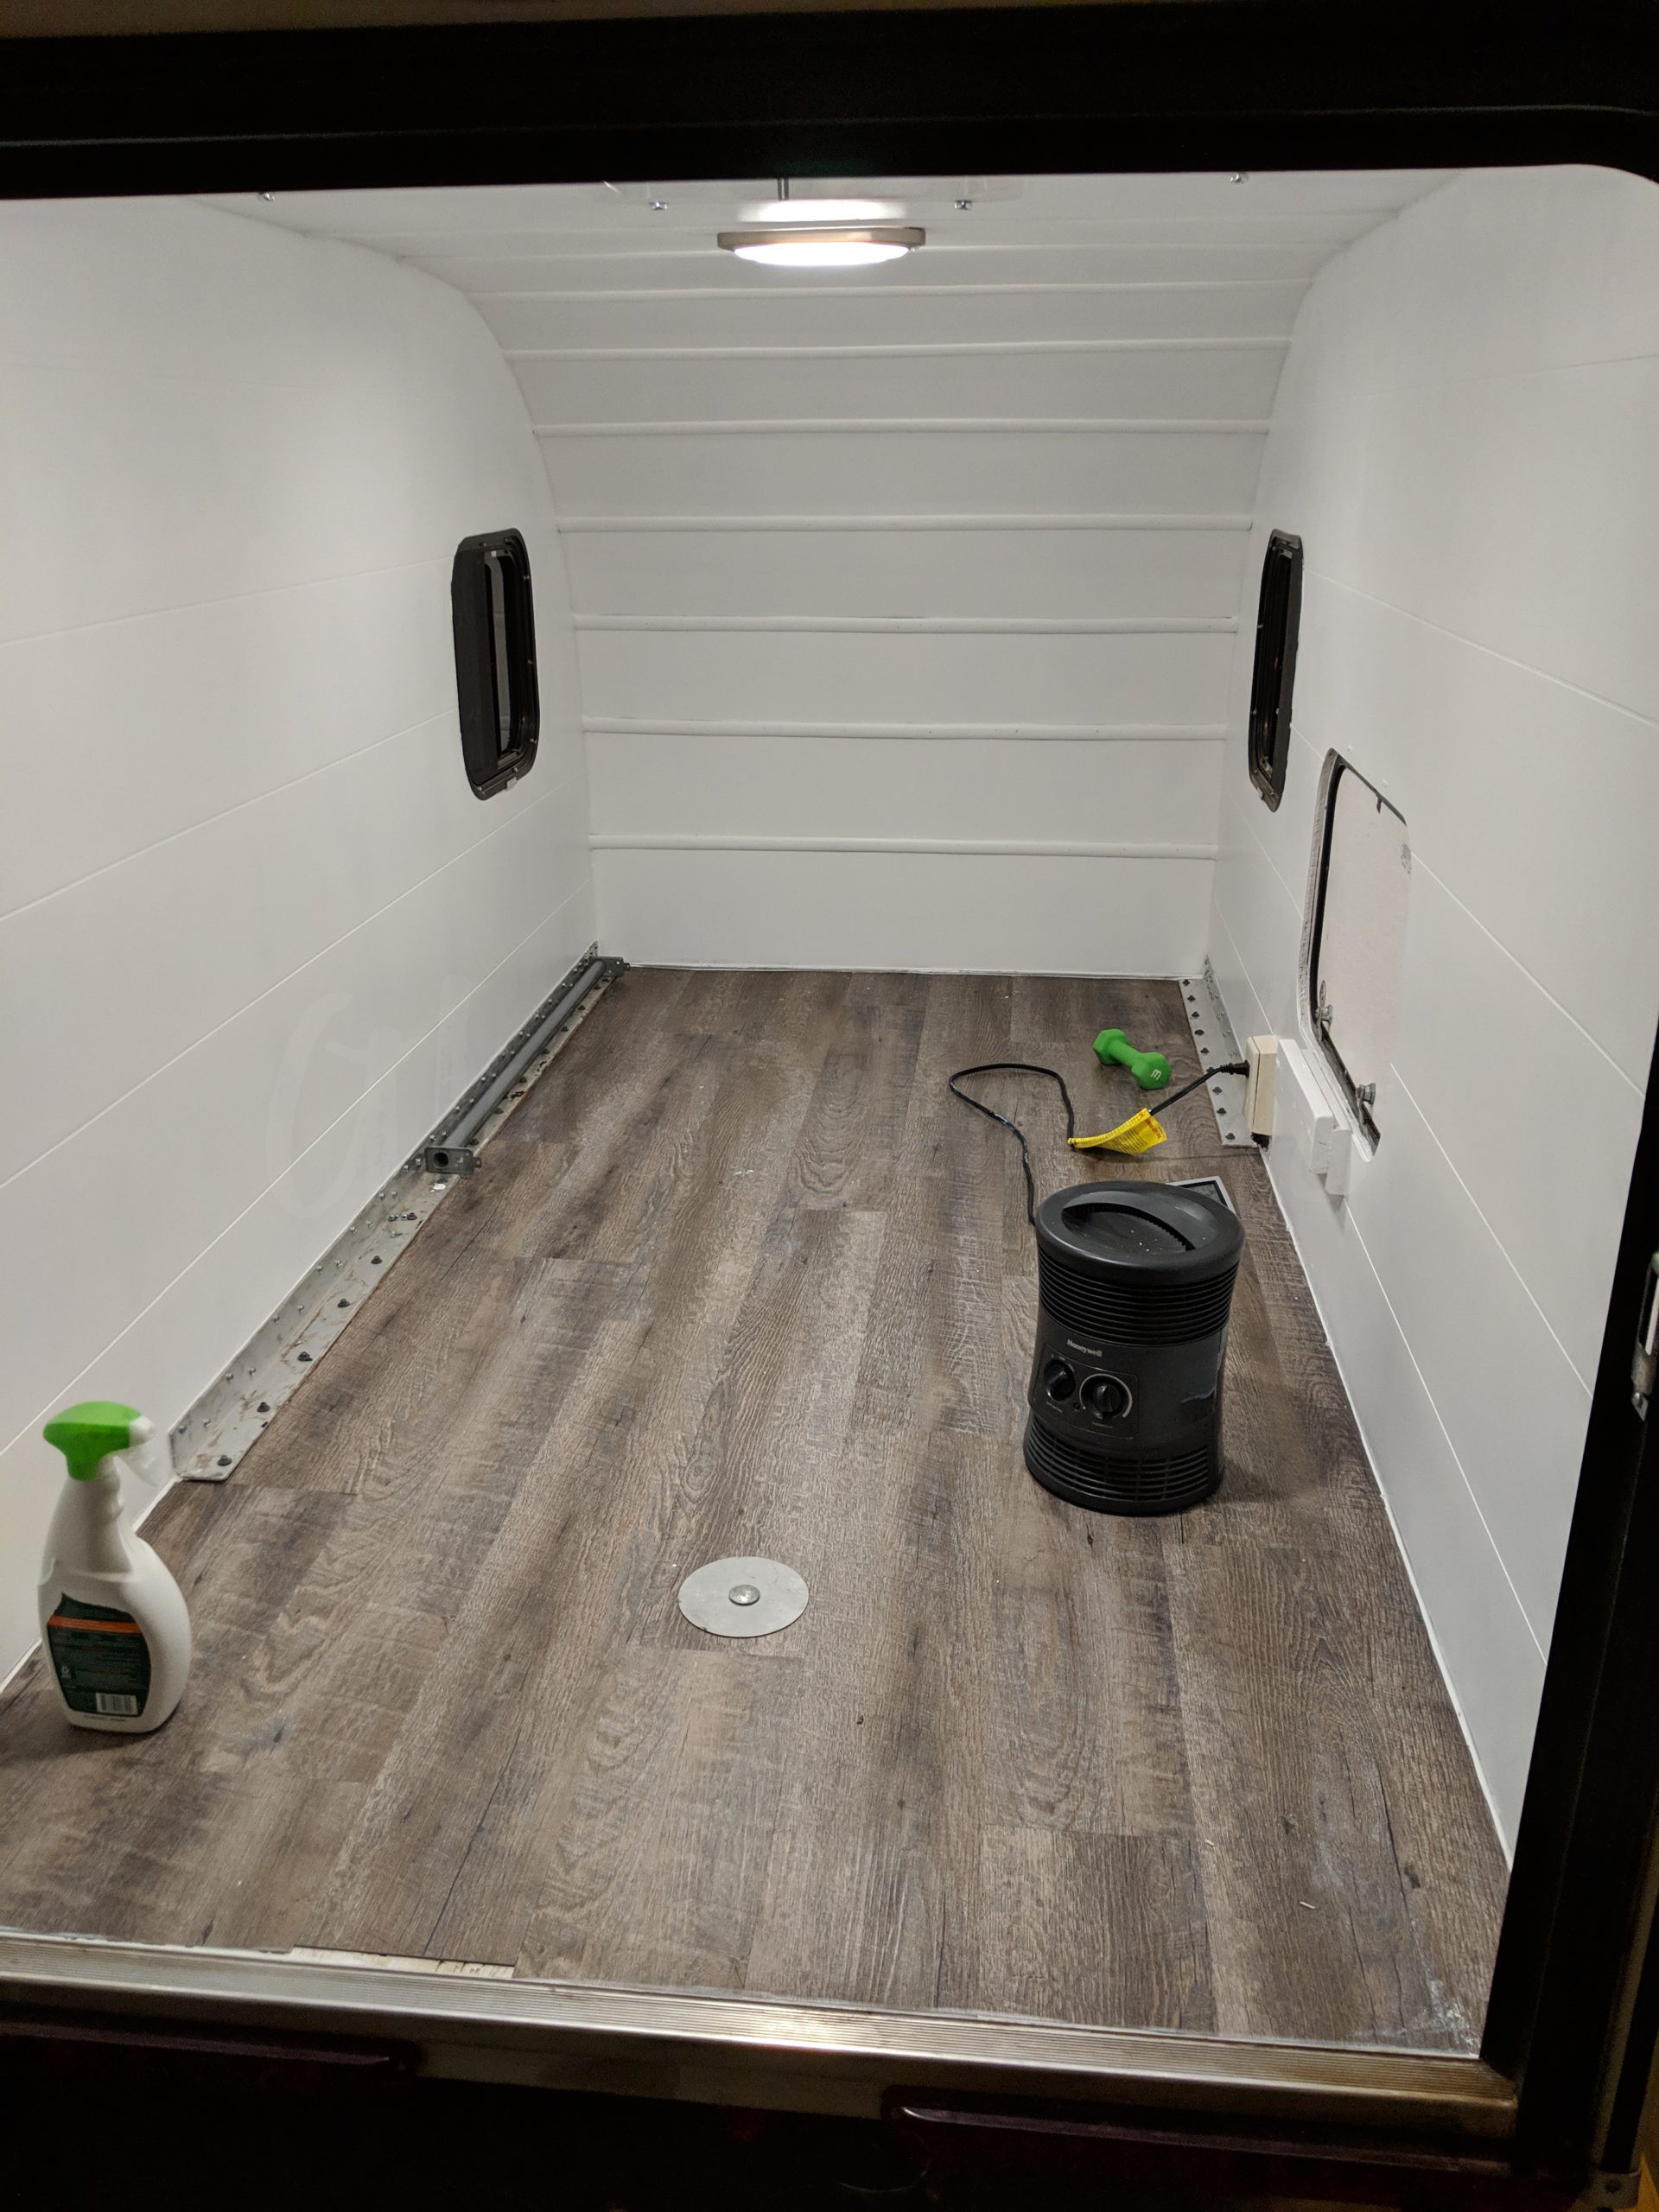
For interior paint I wanted a light and bright white color and opted to use Behr Premium Plus paint in their standard ‘Bright White’ color. I also installed some quarter inch trim to give the camper a more finished look and hide some of the flooring cuts.

Painted 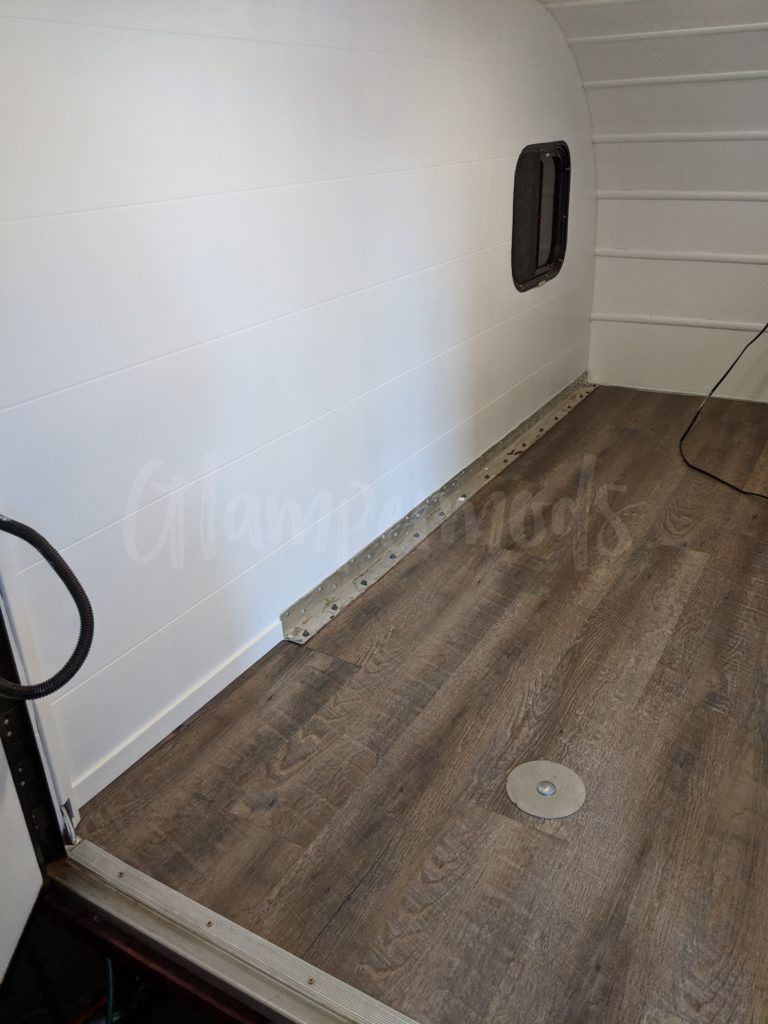
Trim added 
Trim added and fridge dry fit

The bed
I wasn’t 100% sure what to do about the bed. I knew that I wanted a couch that transformed into a bed, but I wasn’t sure how best to go about accomplishing it. I also needed something that filled the entire space. When your whole sleeping area is only 4 feet wide, you need every inch possible, especially if it is going to sleep two people. At first I looked at purchasing a futon or jack-knife RV sofa, but all of the options I found were too tall to be functional when in the couch position. Eventually I gave in to fact that I would likely have to build something custom for the space.
During research into custom pull-out sofas for RVs, I came across what looked like a great solution courtesy of Ian and Mad Mumsie over at deepredmotorhome.com. Their solution was a clever slat design that allowed the front of the couch to be pulled out. As a bonus the entire couch could also be lifted to reveal storage space under the frame. Needless to say, this design was perfect.
The biggest hurdle I still had in front of me was gleaning what I could about the pull out couch design above and modifying it to fit my space requirements. As someone who does not have a lot of experience with furniture building, this was no easy task.
Sketchup to the rescue! I decided to build a mock up of the bed frame in Sketchup so I could better understand how it all would work and to determine what materials I would need to buy for the build. Being able to visualize the couch frame in a 3D space was critical to me being able to actually build this thing.
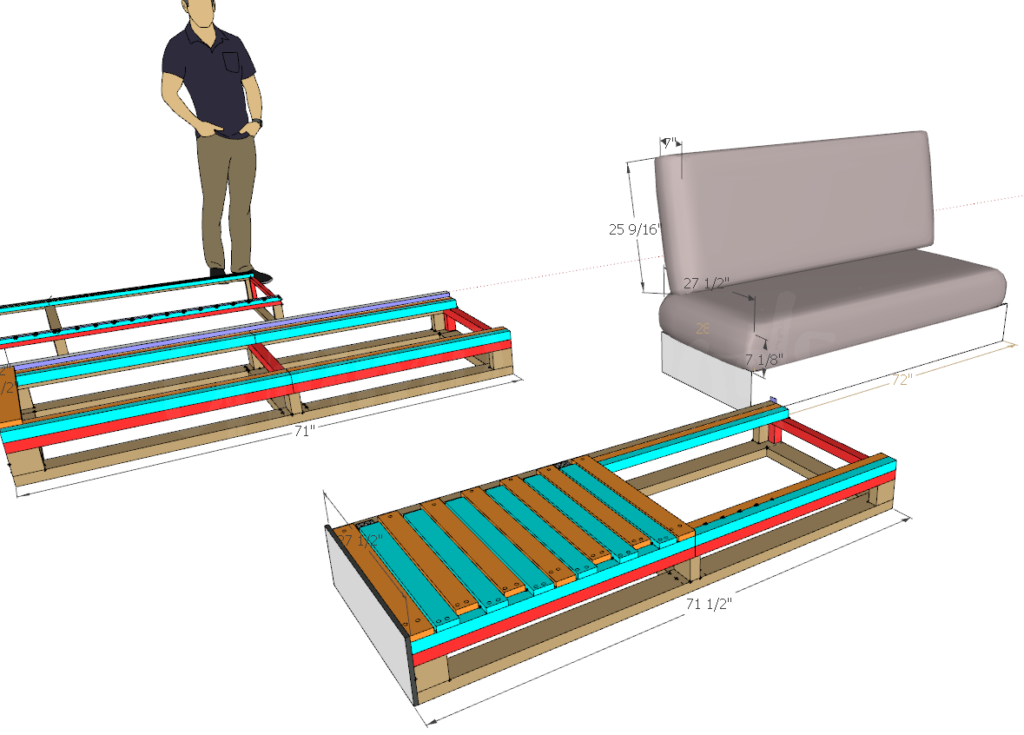
After a few trips to home depot, a couple mistakes, and some slight modifications I had a working pull-out couch frame! I also purchased and installed a small storage drawer.

Finished bed frame 
Bed frame with cushion foam dry fit 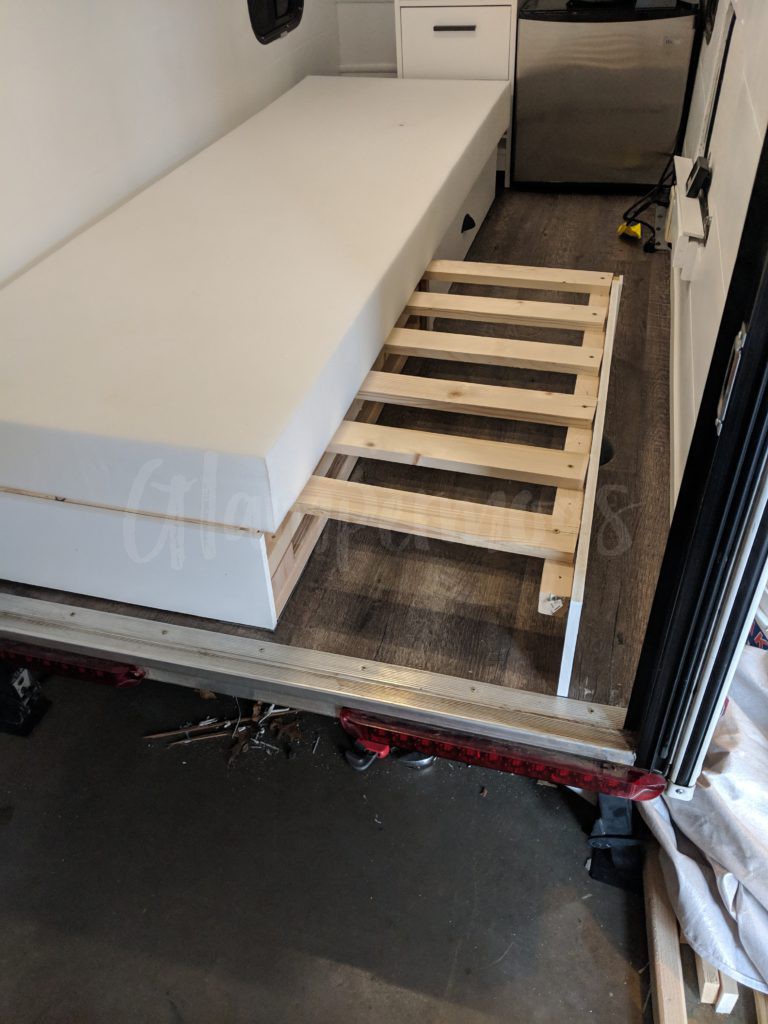
Pull-out action
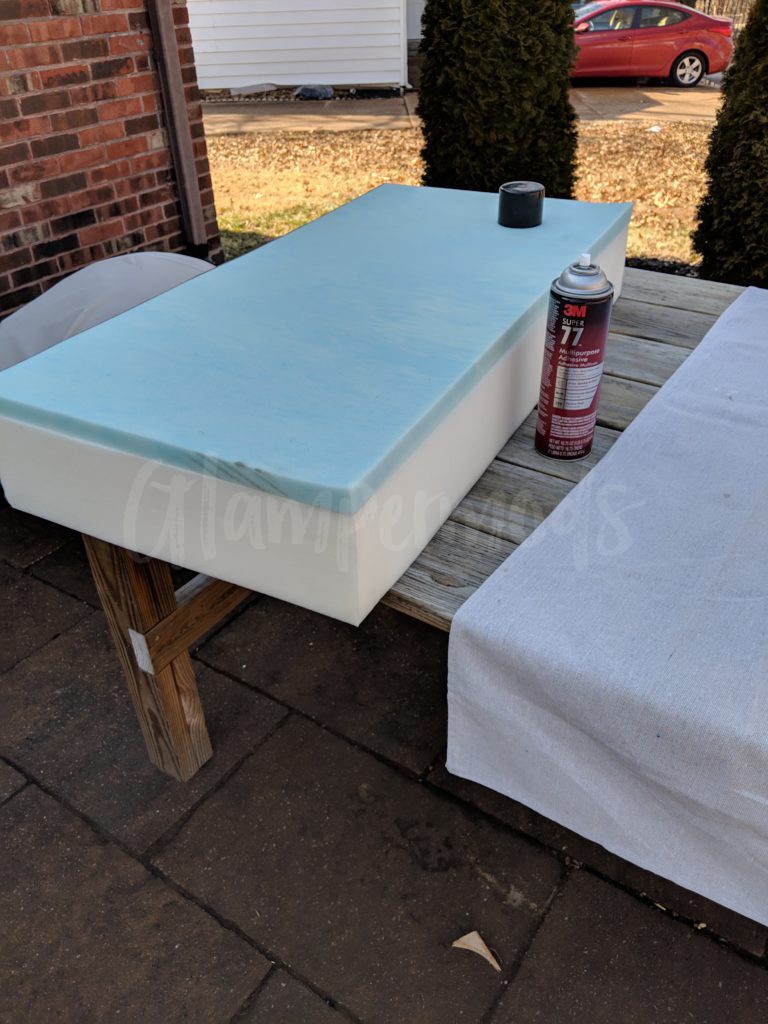
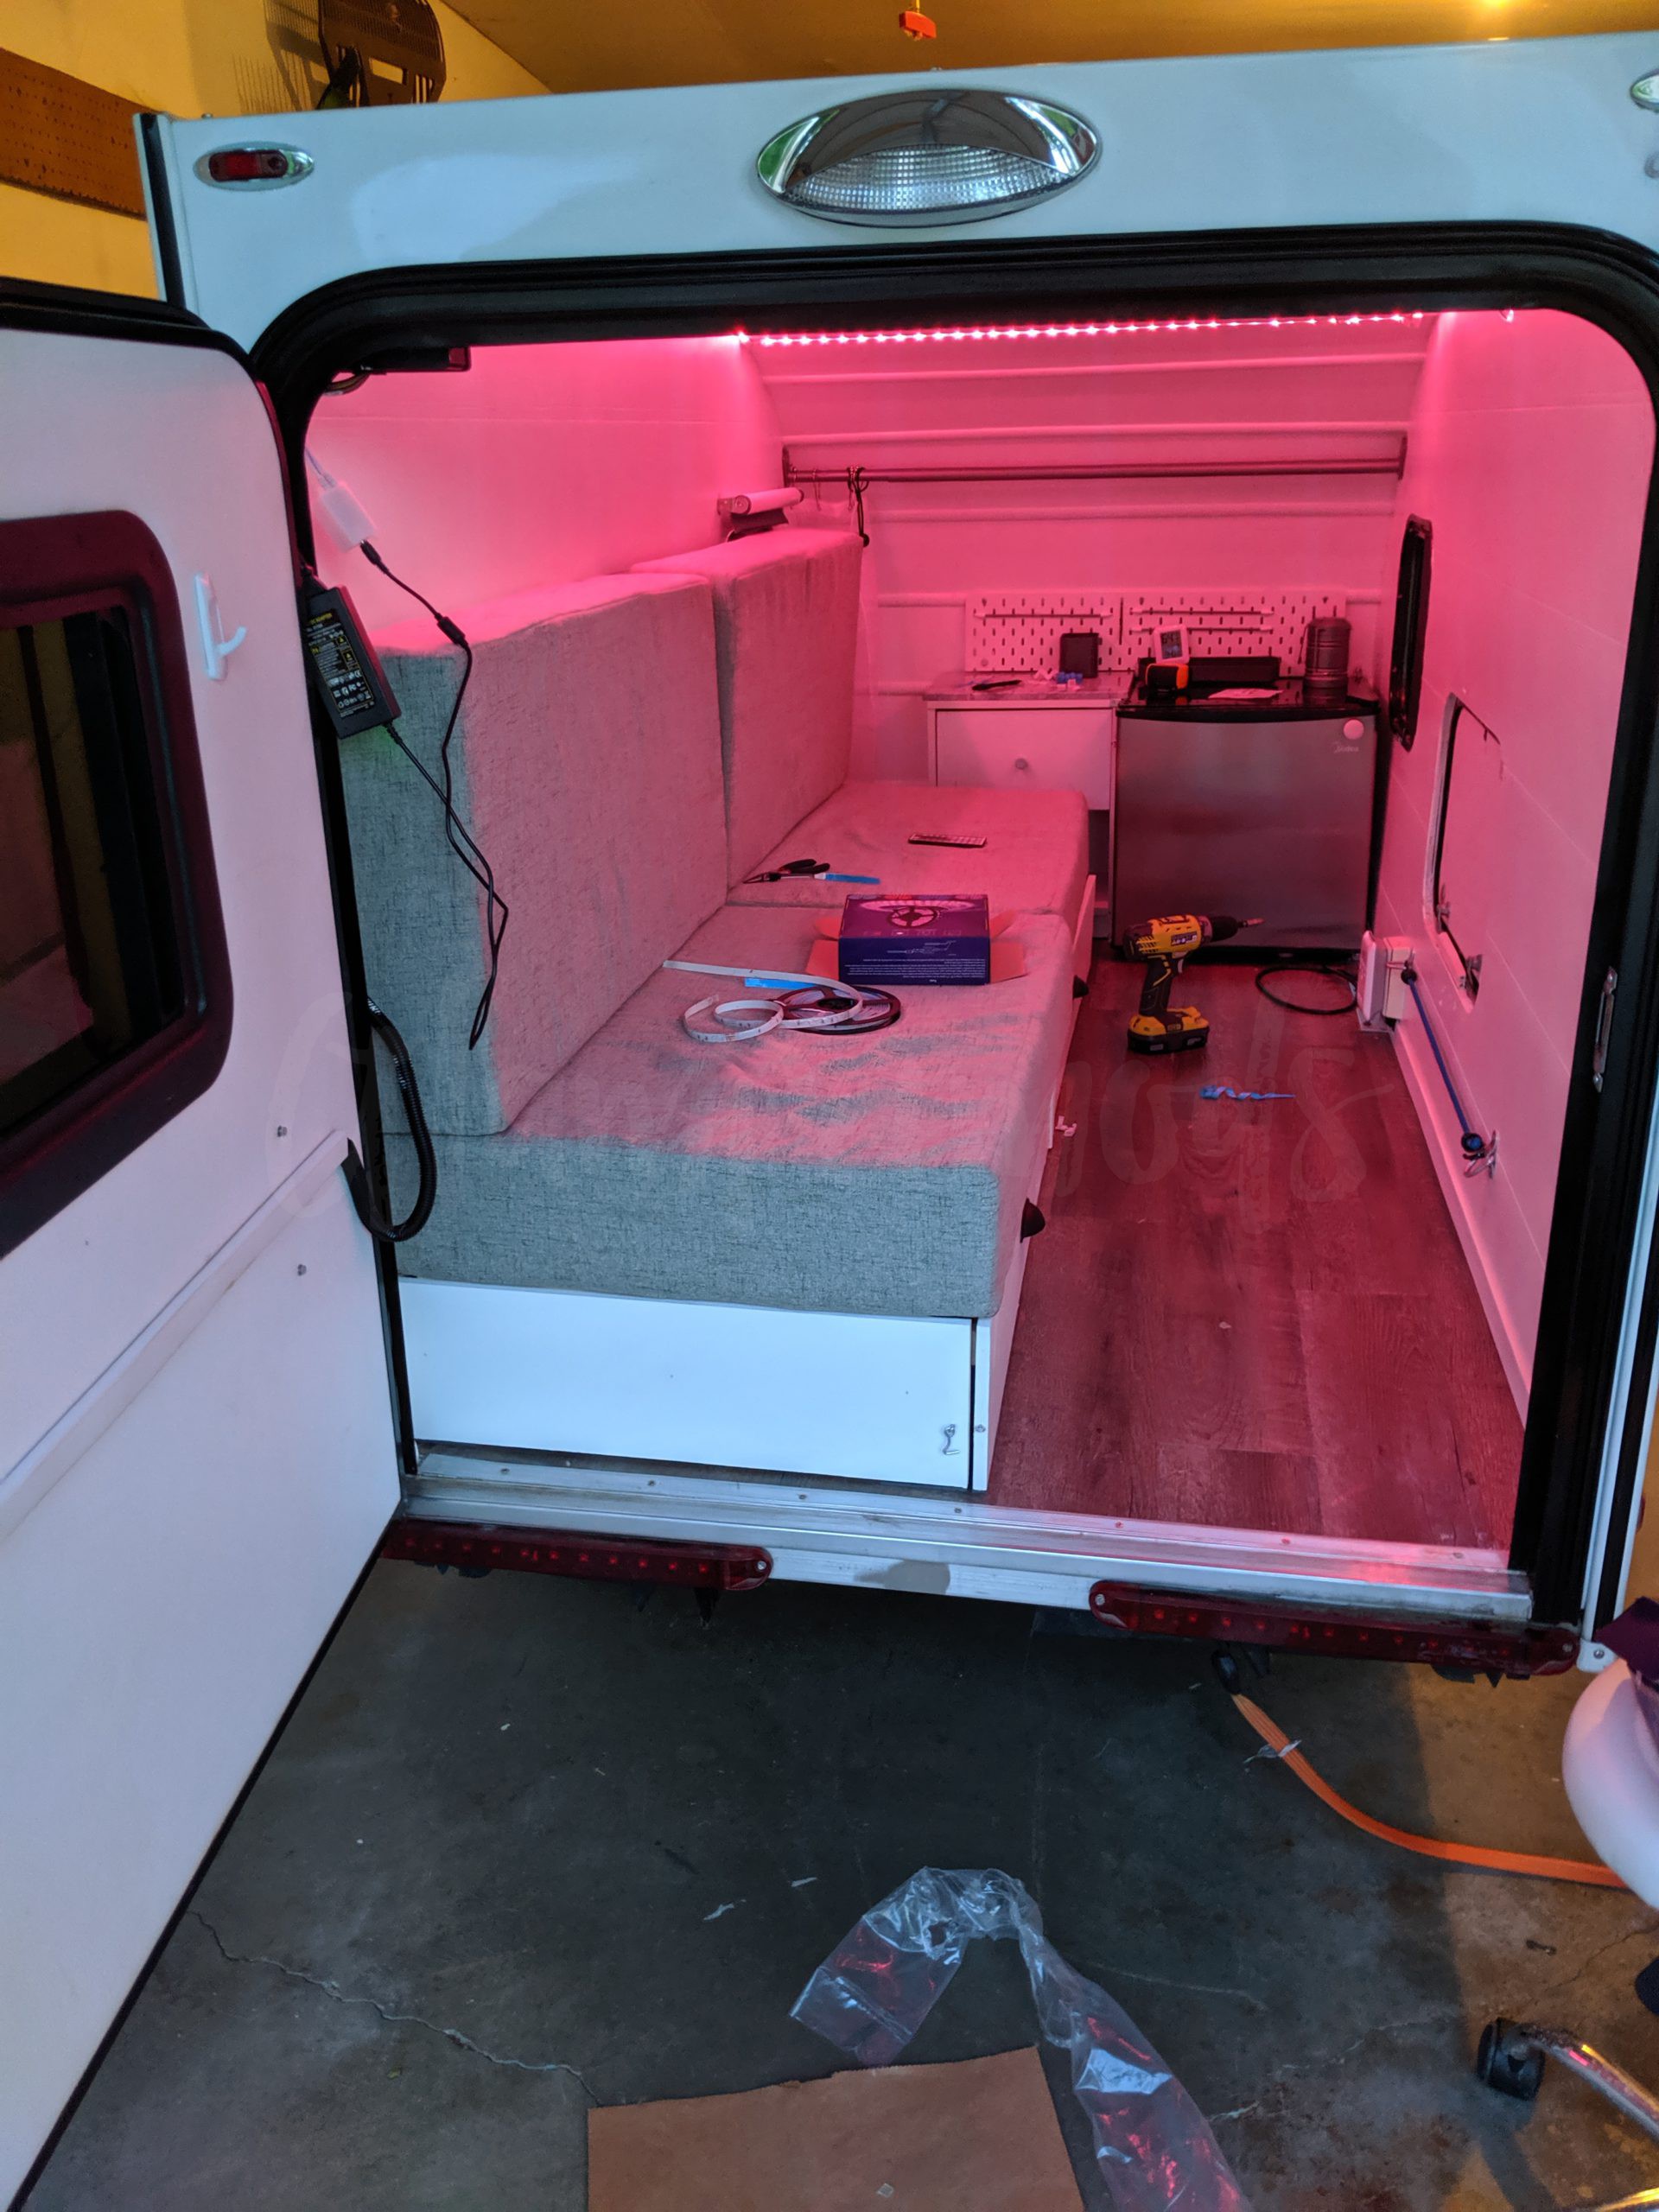
This thing was really starting to come together. All I really had left to do at this point was finish the cushions. For the cushions/mattress I purchased high density foam sheets from Amazon and cut them to size. As an added layer of comfort, I added 1 inch of memory foam to the tops of the cushions and wrapped them in Dacron wrapping using 3M Super 77 fabric adhesive. For the cushion covers I went through Cushions Xpress who made custom zippered cushions for a reasonable price. For the fabric color I chose Lino Grey.
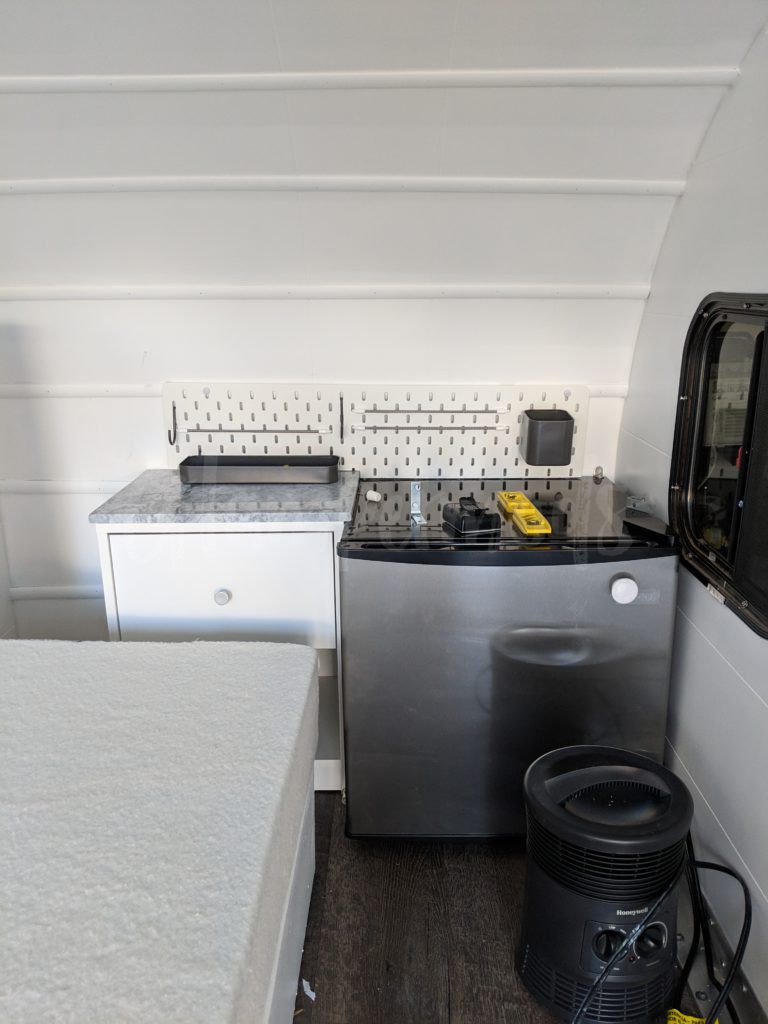
For the fridge, I found a small Midea 1.6 cubic feet stainless steel fridge on Amazon. I chose this fridge because it wasn’t as wide as most of the others I found, which was crucial to being able to open and close the door without hitting the new bed frame. Next to the fridge I installed a small 1 drawer cabinet for additional storage space. To give the drawer a more luxury look and to protect the top from scratching, I added a marble cutting board to the top using construction adhesive. During a last minute trip to Ikea I also picked up a SKADIS Pegboard to use as a sort of functional backsplash behind the fridge and drawer.
The final results
Below is the final result. I am extremely happy with how this turned out, especially since this was my very first camper remodel.
Before 
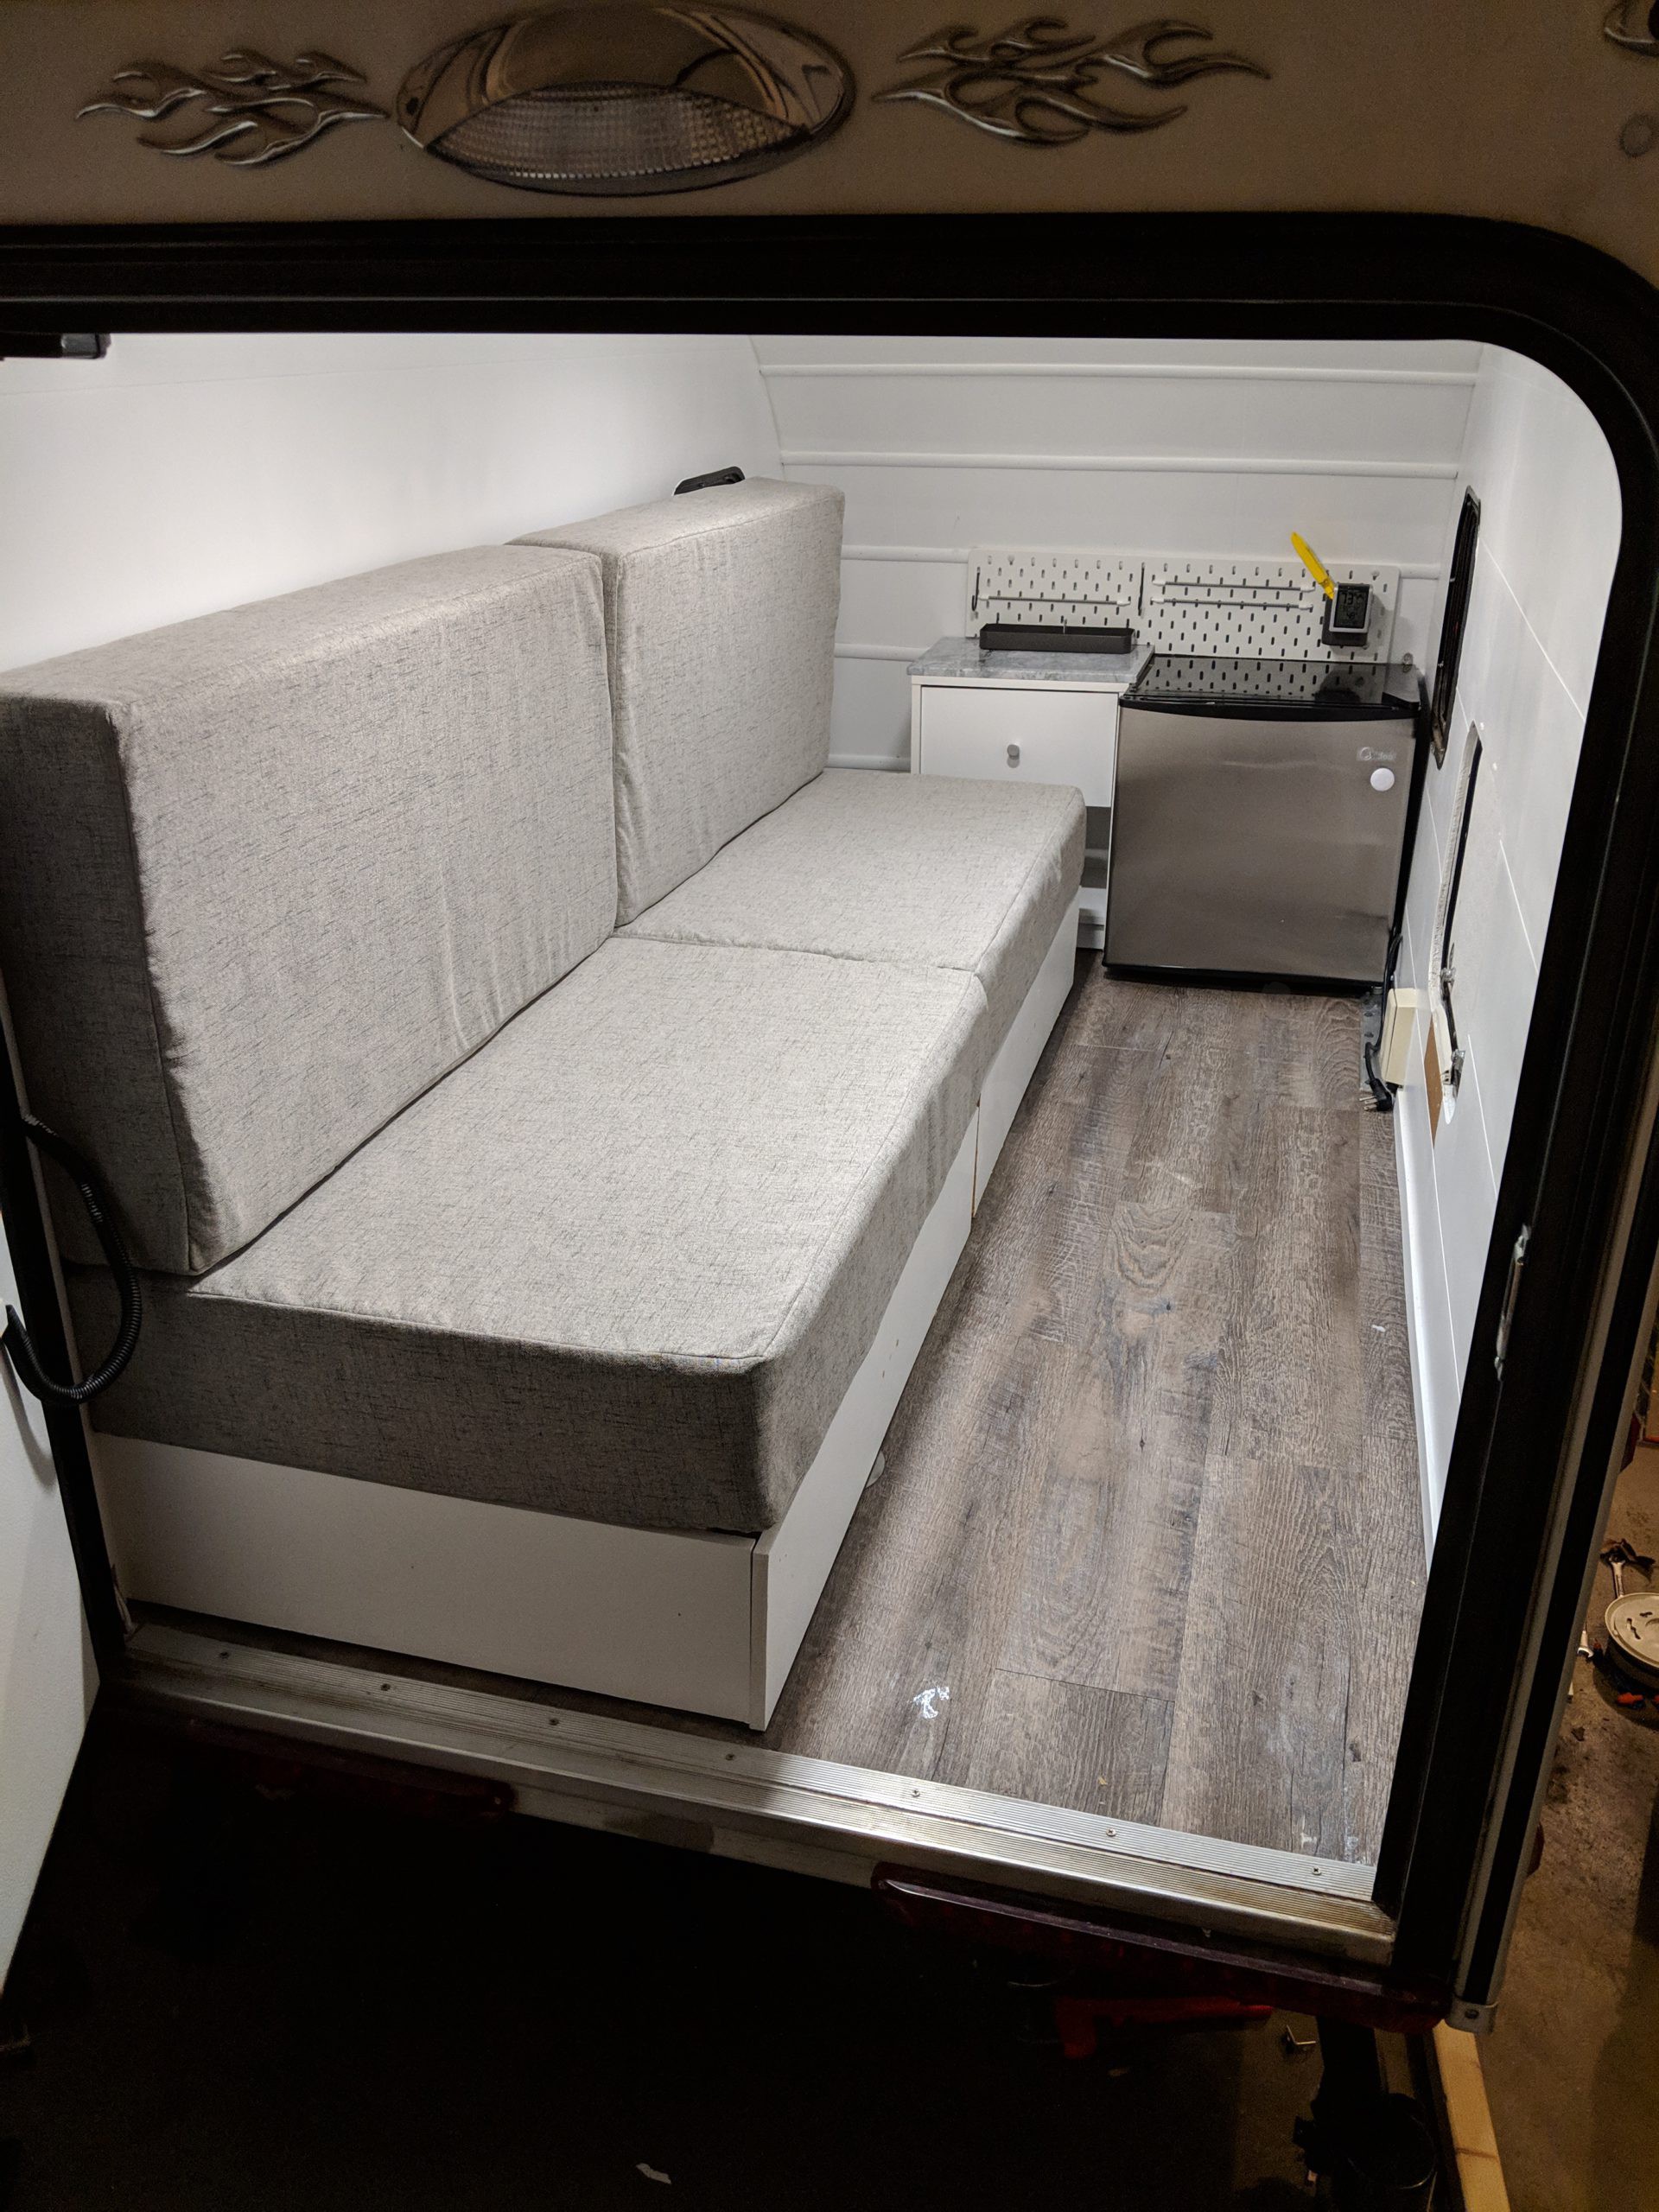
After (bed up) 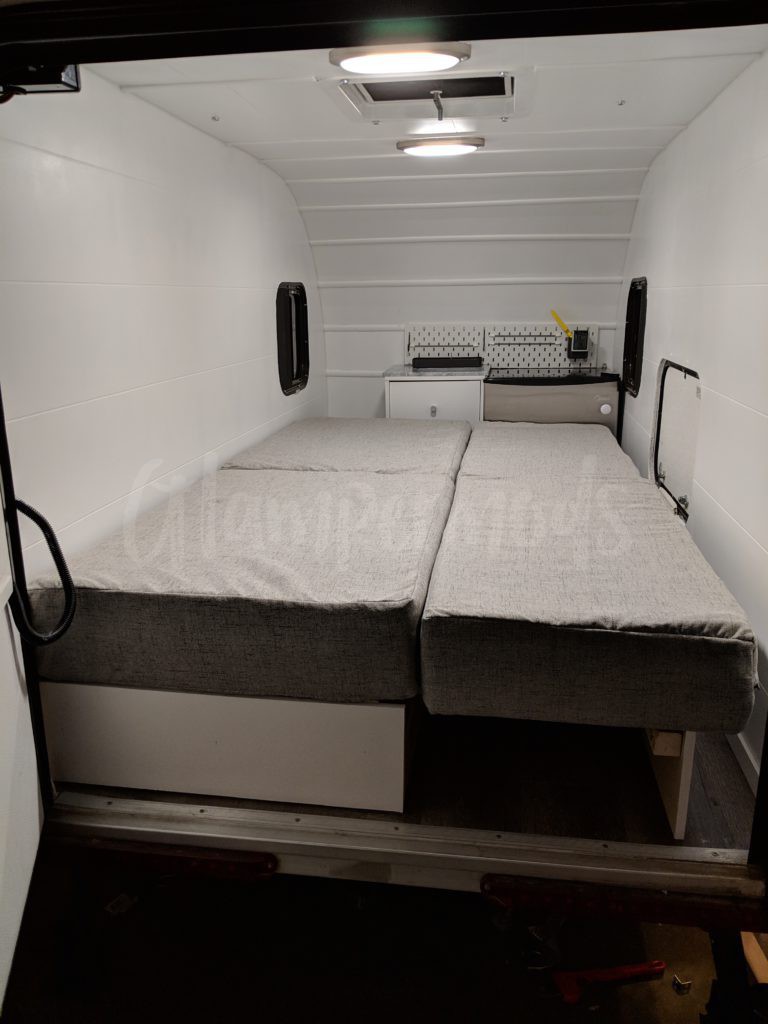
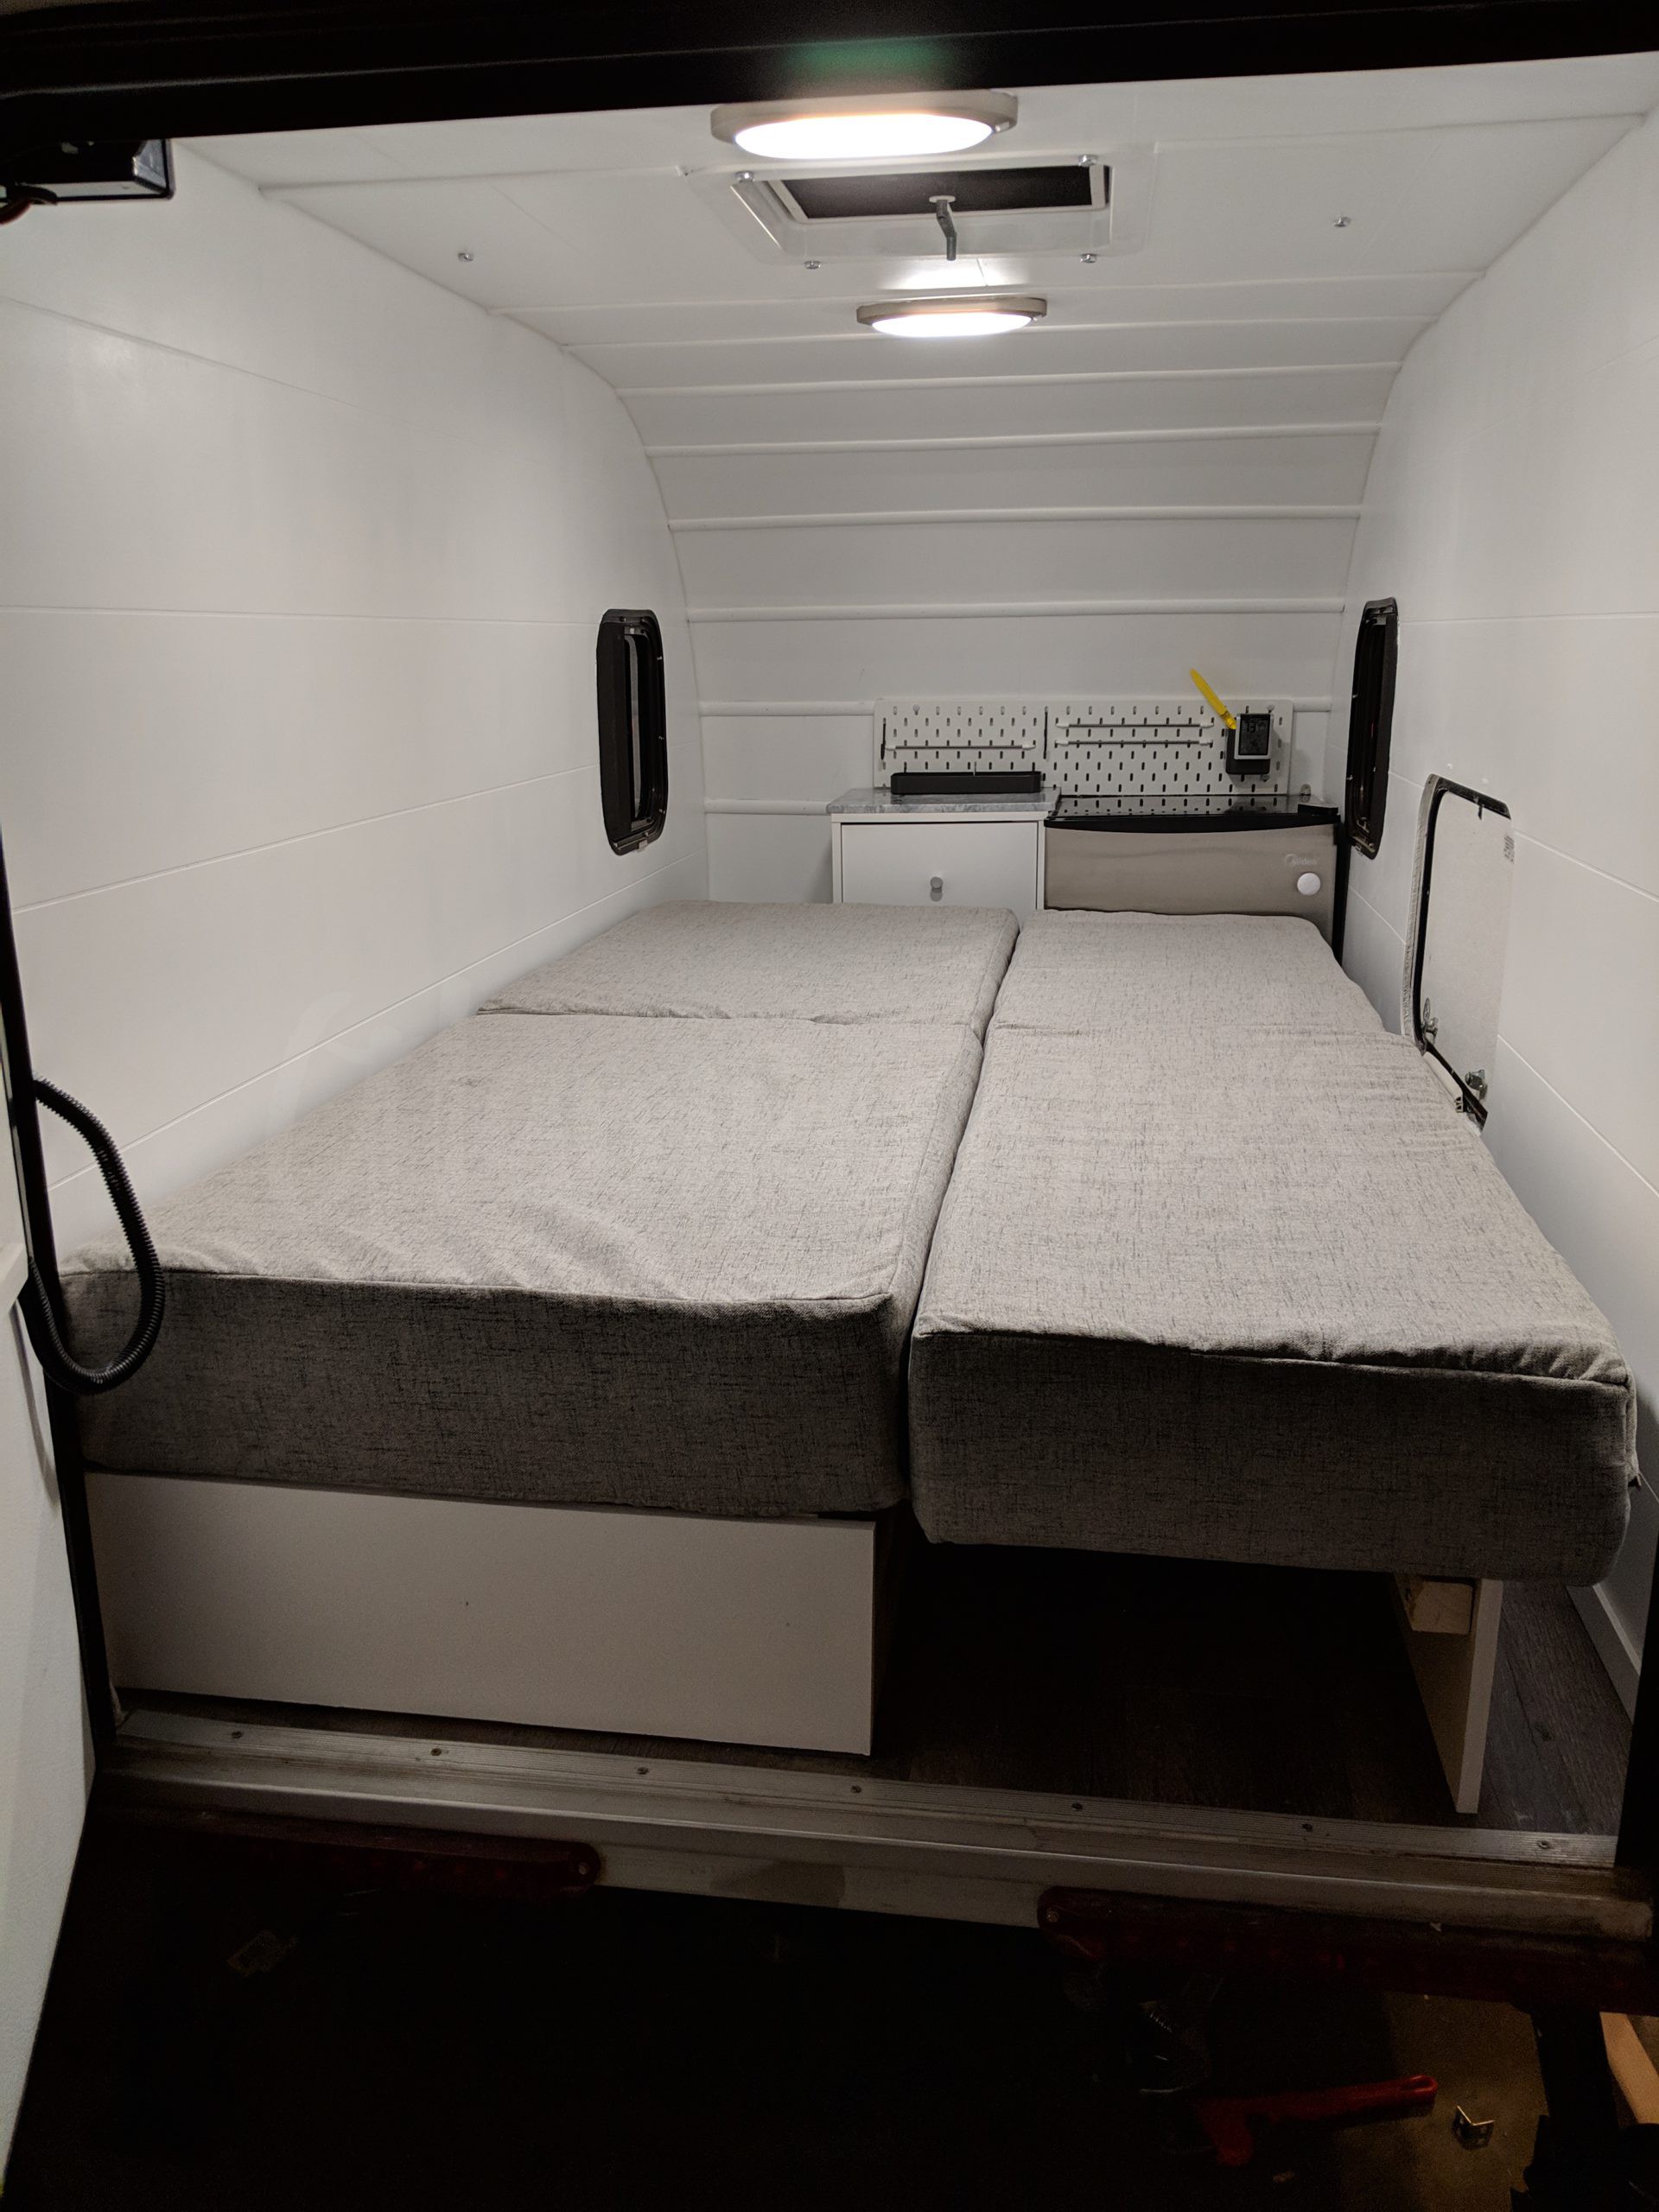
After (bed down)

But wait, there’s more…
What would be the fun in a remodel if you can’t get a little extra? After some research (and a lot of convincing of my wife) I decided to install waterproof RGB LED lighting under the camper and along the roof of the interior. I wired the lights to the battery so that I could turn them on as we drove through the campground to maximize the peacocking.


Recent Comments